



A die set is the precision structural foundation of stamping tooling, and its proper installation, alignment and operation directly determine stamping part accuracy, tool service life and production safety. Standardized operating procedures eliminate misalignment, reduce abnormal wear and avoid safety hazards in high-volume sheet metal stamping production.
Key Takeaways
- Standard die set operation follows a structured workflow: pre-installation inspection, mechanical installation, precision alignment, trial run debugging and formal production.
- Accurate alignment of guide pins and uniform punch-die clearance are the core of debugging, which directly control part dimensional accuracy and burr quality.
- Proper lubrication and regular preventive maintenance extend die set service life and reduce unplanned downtime.
- Strict lockout/tagout safety procedures must be followed throughout installation and maintenance to avoid operational injuries.
- Selecting a high-quality die set with stable material properties reduces debugging difficulty and improves long-term production stability.
Die Set Pre-Installation Preparation
Adequate preparation before installation avoids rework and safety risks, and lays the foundation for smooth subsequent debugging.
Tool and Safety Preparation
Prepare required tools in advance: overhead crane or forklift for hoisting, dial indicator, feeler gauge, shim set, torque wrench, cleaning agent and lubricant. Implement lockout/tagout (LOTO) procedures on the stamping press to cut off power and air pressure sources, and place safety blocks to prevent accidental slider movement.
Die Set and Press Inspection
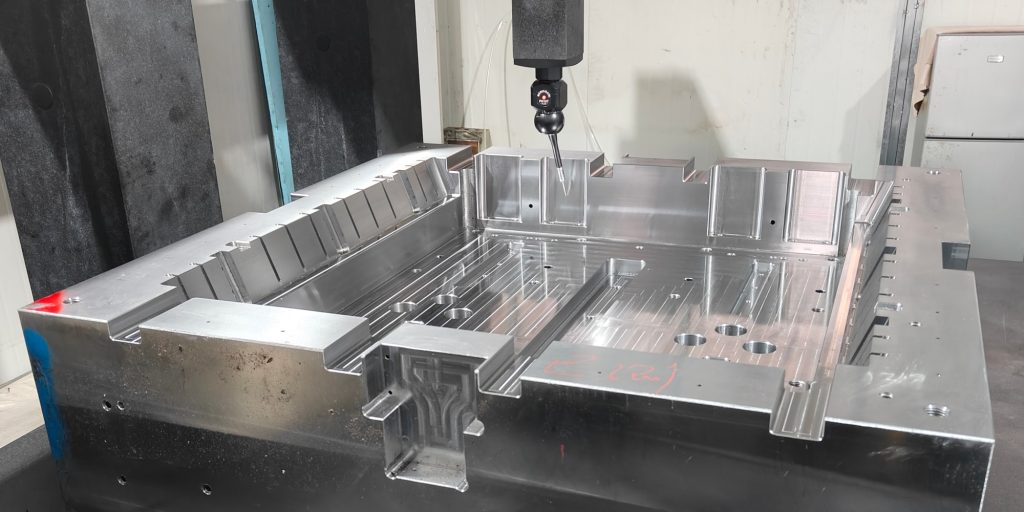
- Inspect the die set for shipping damage: check for cracks on upper/lower die shoes, and confirm guide pins and bushings are free of deformation, scratches or rust.
- Clean the press bolster surface and slider mounting surface to remove metal chips, burrs and dirt, ensuring flat, hard contact with the die shoes.
- Verify that the press stroke, tonnage and opening height match the die set specifications.
Die Set Installation Steps
Follow this standard sequence for safe, accurate installation:
Mount the lower die shoe
Hoist the lower die set onto the press bolster, align it with the press center line, and temporarily fasten it with bolts. Do not fully tighten bolts at this stage to allow adjustment space.
Mount the upper die shoe
Lower the press slider slowly to contact the upper die shoe. Connect the upper die shoe to the slider with mounting bolts, keeping them hand-tight for subsequent alignment adjustment.
Initial closing check
Manually inch the press through one full stroke to check for jamming or abnormal friction between guide pins and bushings. If resistance is felt, stop immediately and readjust positioning.
Die Set Alignment & Precision Debugging

Precision alignment is the most critical step to ensure stamping quality and die set service life.
Guide Pin Alignment
Use a feeler gauge to measure the clearance around each guide pin and bushing. Adjust the position of the lower die shoe until clearance is uniform on all four sides. Uniform guide clearance ensures smooth die movement and prevents uneven wear of guide components.
Punch and Die Clearance Calibration
- Install punch and die inserts onto the die set, then use a dial indicator to calibrate the coaxiality between punch and die cavity.
- Adjust with precision shims to achieve uniform clearance around the entire cutting edge. Incorrect or uneven clearance will cause excessive burrs, accelerated edge wear and even punch breakage.
Trial Run and First Article Inspection
- Run a trial stamping on scrap material of the specified thickness. Inspect the first article for dimensional accuracy, edge burr height and section quality.
- Fine-tune die height and clearance based on test results until parts meet drawing specifications.
- Once qualified, tighten all mounting bolts to the specified torque with a torque wrench to prevent loosening during production.
Die Set Production Operation & Daily Checks

After passing trial run verification, the die set can enter formal mass production.
Standard Production Operation
- Apply proper stamping lubricant to guide pins, sliding surfaces and cutting edges before starting production to reduce friction and heat buildup.
- Run at low speed for the first 10–20 pieces, then gradually increase to rated production speed after confirming stable part quality.
- Never reach into the die area during operation. For material feeding or jam clearing, stop the press and implement LOTO procedures first.
Routine In-Production Checks
Perform inspections every 2–4 hours during continuous production:
- Check for abnormal heating or noise from guide pins and bushings
- Monitor part burr size and dimensional consistency
- Verify that all mounting bolts remain tight
- Clear accumulated metal chips in time to avoid scratching die surfaces
Conclusion
Proper use of a die set — from standardized installation and precision debugging to routine operation and preventive maintenance — is the foundation of stable, high-quality stamping production. Following formal operating procedures not only ensures part accuracy and production safety, but also significantly extends die set service life and reduces total tooling cost.
As a reliable precision die set supplier, NSPM provides high-rigidity, high-precision stamping die sets with full quality traceability, along with professional installation and debugging technical support to help manufacturers optimize stamping production performance.
FAQ
What is the most critical step in using a die set?
Precision alignment is the most critical step. Uniform guide pin clearance and consistent punch-die clearance directly determine stamping part quality and the total service life of the die set and cutting components. Poor alignment will cause rapid abnormal wear and frequent production defects.
How do you verify proper die set alignment?
Alignment is verified in two ways: first, measure guide pin bushing clearance with a feeler gauge to confirm uniform clearance on all sides; second, inspect trial stamped parts for uniform burr height and consistent section quality around the entire cutting edge. A dial indicator can also be used to check parallelism between the two die shoes.
What causes abnormal guide pin wear?
Abnormal wear is most often caused by misaligned installation, insufficient lubrication or overloaded eccentric loads. Long-term operation with these issues will permanently damage guide pins and bushings, requiring replacement to restore die precision.
How often should a die set be maintained?
For daily mass production, perform surface cleaning and lubrication at the end of each shift. Conduct a full precision inspection and fastener torque check every 1–2 months. For intermittent low-volume use, perform a full inspection and anti-rust treatment before and after each use.