


The correct face orientation for cutting wood depends entirely on the type of saw you use, and the core goal is to keep splintering and tear-out off the visible finished face of the workpiece. Wood is made of interlocking fibers; when a saw blade exits the material, it tends to pull fibers upward rather than slicing cleanly through, leaving rough, splintered edges. Choosing the right face orientation ensures this damage occurs on the back, non-visible side of the board.
Key Takeaways
- For handheld circular saws, place the good finished face down. The blade cuts upward, so tear-out forms on the top surface.
- For table saws, place the good finished face up. The blade cuts downward into the top surface, leaving the cleanest edge on the side facing you.
- Tear-out always occurs on the side where the blade exits the wood. Align the finished face to sit on the blade’s entry side for the cleanest result.
- Sharp blades, full workpiece support and painter’s tape along the cut line all help reduce splintering for a smoother finish.
- Rushing cuts or using a dull blade will cause rough edges and excessive tear-out, regardless of face orientation.
Why Cut Orientation Matters: The Cause of Tear-Out
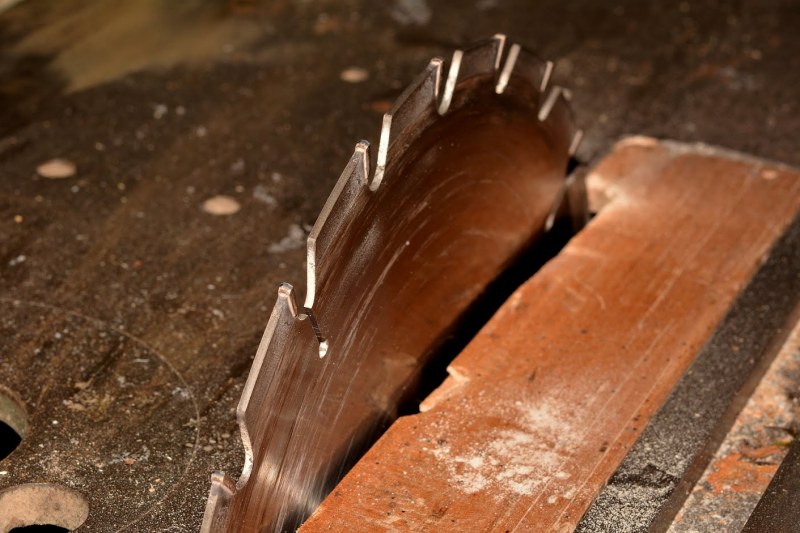
Tear-out (also called splintering) happens when saw teeth pull wood fibers away from the workpiece instead of slicing cleanly through them. This damage is concentrated on the side where the blade exits the material, because there is no backing support to hold fibers in place as the teeth pass through.
Several factors make tear-out worse:
- Dull or low-tooth-count blades that rip fibers instead of shearing them
- Excessively fast feed speed that doesn’t give teeth time to cut cleanly
- Unsupported wood edges that allow fibers to bend and break away
- Cutting against the grain direction, which makes fibers more likely to lift and tear
Clean cuts not only produce a better visual finish, they also require less sanding and post-processing, and create stronger, more precise joinery.
Correct Orientation by Saw Type
Each saw style has a different blade rotation direction, which means the clean cut side and the tear-out side switch positions.
Circular Saw: Good Face Down
A handheld circular saw blade spins upward, entering the wood from the bottom and exiting at the top. This means the bottom surface receives a clean, sheared cut, while the top surface is prone to splintering and tear-out.
To protect the visible finished face, place it face down against the saw base or support surface. All tear-out will occur on the back, unseen side of the workpiece. This rule applies to plywood, solid hardwood and softwood panels cut with a handheld circular saw.
Table Saw: Good Face Up
A table saw blade protrudes upward through the table surface, cutting downward into the top face of the workpiece and exiting at the bottom. The top surface — where the blade enters — gets the cleanest cut, while tear-out forms on the underside of the board.
For this reason, always place the good finished face up when running material through a table saw. This orientation is standard for workshop ripping and crosscutting of solid wood and sheet goods.
Circular Sawing Machines: Proper Workpiece Positioning for Steel Cutting

Unlike handheld woodworking circular saws, industrial circular sawing machines for steel processing are designed to cut through metal with controlled feed rates, rigid clamping systems, and precision saw blade guidance. The quality of the cut is determined less by a “face up” or “face down” orientation and more by proper workpiece positioning and secure material support.
For the best cutting results, steel tubes, bars, and profiles should be firmly clamped to minimize vibration during sawing. Correct positioning helps reduce burr formation, improves dimensional accuracy, and extends saw blade life. NHC circular sawing machines are engineered to deliver clean, consistent cuts across a wide range of ferrous and non-ferrous materials, ensuring high productivity and excellent surface quality.
Tips for Cleaner, Splinter-Free Cuts
Orientation is the foundation, but these additional steps will further improve cut quality, especially on delicate veneers and plywood.
Choose the Right Blade

- Crosscut blades with more teeth produce smoother edges for cuts across the grain.
- Rip blades have fewer teeth for faster cuts along the grain, but leave a rougher surface.
- Plywood-specific blades with fine, sharp teeth minimize splintering on layered veneer surfaces. Always use a sharp blade. Dull teeth crush and tear fibers instead of cutting them, and increase the risk of kickback.
Support the Workpiece Fully
Unsupported wood edges will splinter as the blade exits, because fibers have nothing holding them in place.
- Use sawhorses or cutting supports to keep both sides of the cut line stable through the full cut.
- For extra clean cuts, use a sacrificial backer board behind the workpiece. The blade will cut through both the wood and the backer, keeping fibers supported all the way through.
Use Painter’s Tape for Delicate Surfaces
Apply a strip of painter’s tape directly along the cut line before sawing. The tape holds surface fibers in place, preventing them from being pulled up by the blade teeth. This is especially effective for plywood, veneered panels and thin hardwoods.
For an even cleaner edge, score the cut line with a utility knife first to sever surface fibers, then saw along the scored line.
Common Mistakes to Avoid
Reversing the Face Orientation
The most common error is using the wrong face orientation for the saw type. Always double-check which side the blade exits on before cutting, and mark the waste side of the material to avoid confusion.
Pushing the Saw Too Fast
Forcing wood through the blade too quickly doesn’t give teeth time to shear fibers cleanly. This causes rough, splintered edges and puts extra strain on the saw, raising the risk of kickback. Move at a steady, moderate pace for the best results.
Skipping Edge Support
Leaving the offcut side of the board unsupported will almost always cause tear-out at the end of the cut, as the falling piece rips fibers away from the main workpiece. Always support both sides of the cut line.
Conclusion
There is no universal answer for cutting wood face up or down — it depends entirely on how your saw’s blade moves through the material. By following the core rule of keeping the finished face on the blade’s entry side, and pairing good orientation with sharp blades, proper support and simple anti-tear-out tricks, you can consistently achieve clean, splinter-free cuts on every project.
FAQ
What happens if you cut wood with the wrong face up?
Tear-out and splintering will appear on the visible finished face, leaving a rough, uneven edge. Minor damage can be fixed with sanding, but severe splintering can ruin the visible surface of the workpiece.
Does painter’s tape really prevent splintering?
Yes. Painter’s tape secures the top layer of wood fibers in place, reducing how much the saw teeth can pull them upward. It works best when paired with a sharp blade and steady feed speed, and is particularly effective on plywood and veneered materials.
Why do circular saws and table saws need opposite face orientations?
The two tools have opposite blade rotation directions. A circular saw cuts from bottom to top, so tear-out forms on top. A table saw cuts from top to bottom, so tear-out forms on the bottom. Aligning the good face to the blade’s entry side keeps it clean in both cases.
How does blade sharpness affect cut quality?
A sharp blade shears wood fibers cleanly, leaving a smooth, even surface. A dull blade crushes and tears fibers instead of cutting them, resulting in rough edges, excessive splintering, and higher risk of kickback during operation.